In Review...
In AppSheet & FRC: Episode 2, I explained how to give scouters multiple screens through which to supply information, as well as how to add a heading to each screen. I then wrapped up the episode by adding a large number of new columns to the app, giving us ample data to work with for each entry into the database. Moving forward, I’ll explain how to add a few final touches to the AppSheet side of things before moving over to Google Sheets.
Requirements
When a scouter is adding information to our database, there is some information that is absolutely necessary for an entry in the database to be usable and some information that are just “nice to have.” An example of a piece of data in the former category would be the Team Number field of the robot they are scouting—a score in the database is nonsensical if it doesn’t have an associated robot. An example of a piece of data in the latter category would be the Notes field—sometimes, scouters will have nothing additional to add, in which case the Notes field can (and should) be left blank.

We can decide what information is required and what information is option directly in AppSheet through the use of the Require? checkbox. This option can be seen in the columns view for the Match Scouting table by scrolling right, or it can also be edited by clicking the pencil icon for a column and scrolling down to Data Validity > Require?. In the screenshot on the left, the second column from the top is marked as required.1In this screenshot, it happens to be the Key column we created back in Episode 1.
If a column is marked as required, AppSheet will not allow an entry to be submitted, or even allow the user to progress to a new screen, if that column is not filled out.
For our app, we want almost every column to be marked as required. Mark the Require? checkbox for every column except _RowNumber, Notes, and the Show columns. We’re leaving the _RowNumber and Show columns alone because they don’t store data in the traditional sense; therefore, trying to enforce a policy requiring data to be stored in them would not work well. The Notes column is left unrequired for reasons explained above—sometimes, scouters won’t have anything further to contribute.
Now that we have columns marked required, scouters are prevented from forgetting to input data in a certain column. Even if a robot scored no points, we don’t want to leave any columns blank: in such a case, the scouter should explicitly record a result of 0. Now, AppSheet will enforce this policy on our behalf.
Limits
As well as requiring scouters to fill in certain columns, we can also place limits on what data they’re allowed to enter in those columns. By default, AppSheet allows input of data that, for our purposes, would be nonsensical. For example, it doesn’t ever make sense that a robot could score a negative amount of Cargo. However, currently, our app will allow negative numbers to be entered.
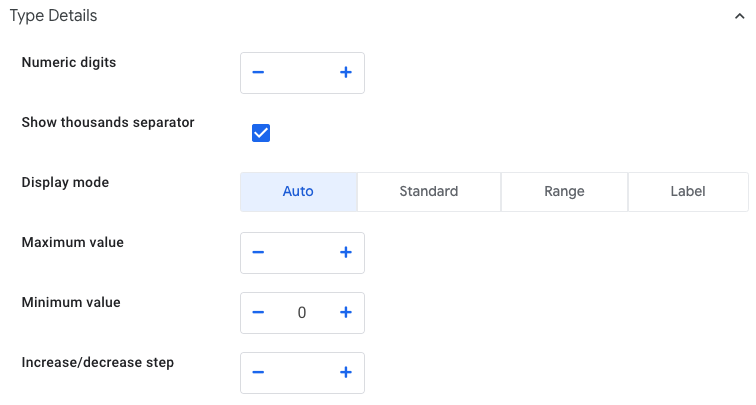
To remedy this, edit the each row for recording Cargo scored,2Those rows being Upper Hub Auto, Lower Hub Auto, Upper Hub Tele, and Lower Hub Tele changing the Type Details > Minimum value field to be 0, as shown on the right. Similarly, Match should have a minimum value of 1, and Team Number should have a minimum value of 1 and a maximum value of 99999.

UI Updates
As another way to improve the experience of our scouters, we can make a few small improvements to the User Interface, or UI, to make it more convenient to enter data. Note that the instructions in this section are more suggestive than prescriptive—if your team prefer’s AppSheet’s defaults, just leave things as they are.
The first change involves those little plus and minus buttons that AppSheet adds when a column is of the Number type. These buttons are useful when the column is tracking something that might conceivably be incremented (such as the amount of Cargo scored), but less useful when the number is merely a static identifier (such as a match’s number).

To disable the plus and minus buttons for the Match and Team Number columns, edit them to change the Type Details > Display mode field to be Label instead of Auto. This tells AppSheet that the number in question is a static identifier, and that displaying buttons to increment or decrement the value in question wouldn’t be useful.

The next change is to modify the way AppSheet displays the Taxi column. Currently, the two options for our scouters are Y and N, which are functional, but not very descriptive. Edit the Taxi column to change the Type Details > Yes/No display values field to have the values of "No" and Yes respectively. Using double quotes is necessary in this case because otherwise AppSheet will automatically capitalize the full word.
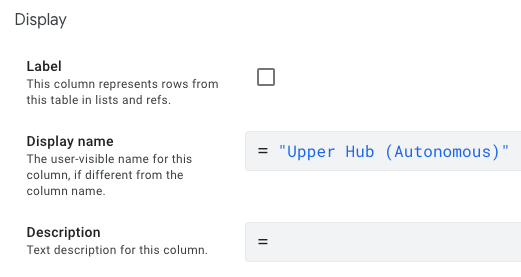
The last change to make (for now) is to change the display settings for a few more columns. One example of this is the Upper Hub Auto column. Although this is a good name for behind the scenes calculations, removing abbreviations from the end product to reduce jargon is another way to make our scouters have a smoother experience. Edit the Upper Hub Auto column to change the Display > Display name field to have the value "Upper Hub (Autonomous)".
Make similar changes to the Lower Hub Auto, Upper Hub Tele, and Lower Hub Tele columns, changing their display names to "Lower Hub (Autonomous)" , "Upper Hub (Teleoperation)" , and "Lower Hub (Teleoperation)" respectively. Don’t forget the double quotes.

There are many other potential UI improvements that could be made, but in the interest of time, I’ll leave you to discover them on your own. AppSheet is extensively documented, and if you really get stuck, don’t hesitate to ask online: I know from personal experience that there are many people willing to share their knowledge.
Principle of Least Privilege
Computer science has a tenet called the Principle of Least Privilege which states—loosely speaking—that any given user should only be given access to the minimum amount of information and authority necessary to complete their job. Allowing an individual more privilege than absolutely necessary introduces more opportunities for mistakes and bad actors to damage a system.
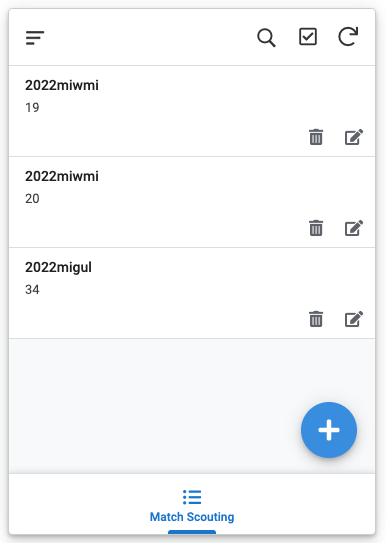
Applied to our scouting app, this means that scouters should only be allowed to use our app to scout other robots—more specifically, they should only be allowed to add entries to our database. However, currently, it’s also possible for scouters to delete entries from our database using the trash can icons on the main screen of our app (as shown on the right). In fact, we don’t even want them to be able to edit previous entries—that could seriously mess with any analysis we do later.
To remedy this, go to the Tables tab and select the Match Scouting table, then untick the boxes allowing Updates and Deletes. After you’re done, you should see something similar to the screenshot below.
Note that even with this change in place, you’ll still be able to edit or delete entries manually in Google Sheets—if a scouter makes a mistake, it can still be remedied.


What Next?
At this point, our app is feature-complete and polished. It’s time to move from AppSheet to Google Sheets and dive into analyzing our data.
In the next episode, I’ll explain a few advanced Google Sheets formulas in preparation for future episodes. More specifically, I’ll be discussing =ARRAYFORMULA, =VLOOKUP, and =QUERY, all of which will be invaluable as we move on to analyzing our data.
